Home Blog Shop Gallery About Info Free Patterns  
Amigurumi Miss Turtle

Amigurumi Crash Course


What is Amigurumi?

Amigurumi is Japanese art of crocheting small dolls and animals. Amigurumis are usually worked in single crochet, in spirals, using increases and decreases to make the various shapes. Typical amigurumi has very large, oversized head and small body with tiny little arms and legs. The term “amigurumi” is used now to describe any crocheted stuffed softie.

So, you've seen somewhere a cute amigurumi and you wish you could make it but you've never done anything similar... You were looking some free patterns but you're confused with all the abbreviations they use.....

Ok, here are the steps you need to follow to learn some basic things and to be able to make your first amigurumi.

You should learn:
1. how to start – Magic adjustable ring and Simple Twist Start
2. 3 basic stitches: chain stitch (ch), slip stitch (sl st) and single crochet (sc)
3. how to increase and decrease in single crochet (sc)
4. how to end the shape (head, body, arm, leg etc...)

Follow these 5 steps and you'll be able to make your first ami.

Image 01 - Make a loop

Image 02 - Insert hook in center of loop and yo


1. How to start

There are many ways to start the project. I'll concentrate on 2 methods which I use the most:

- Magic adjustable ring if I make a flat circular or round shape (like a ball).
- Chain stitch with so-called Simple Twist Start if I want to make a flat piece (such as scarf). Or if I want to work in elliptical rounds (cell phone cozy, for example).

Magic Adjustable Ring

First make a loop with your yarn leaving 3” long tail (Image 01). Insert hook in center of loop made, yarn over (yo) (Image 02) and draw up loop (Image 03). Yarn over (yo), pull through to make your first chain.(Image 04) (Do not count this as your first sc)

Continue to crochet over the loop and the yarn tail until you have the required number of single crochets (scs) for your first round. For example, if the pattern calls for 5 scs, then sc 5 times into the ring. (Insert hook into the center of the ring and draw up loop, yarn over (yo) and draw through both loops.)

When counting stitches, don't count the chain on the hook. When you're finished, pull the tail to close the ring. (Image 05)


Image 03 - Draw up loop Image 04 - Yo and pull through - first stitch made Image 05 - Pull tail to close the ring


Chain stitch

Step 1: Start with co-called Simple twist:
Make the loop of yarn and hold it by the thumb and the first finger of the left hand as you always do when you begin to crochet.(Image 06)

Hold the hook in the right hand in the same way as you hold pen when writing. Insert the hook under the loop and rotate one complete turn counterclockwise.(Image 07) The yarn will be twisted around the shank of your hook. Catch the yarn with the hook(Image 08) and draw it through the loop(Image 09). You made the very first stitch which will give professional look to the beginning of your crochet work. But, do not count this first stitch as a stitch. Don't count the loop on the hook as a stitch either.

Step 2: Catch the yarn with the hook and draw it through the loop. (Image 10)

Repeat step 2 for each chain that you need to make until you have made enough chains for the pattern you are making.

You've just made the Foundation row - it's called the foundation because it is the base you start from.
(Image 11)

See a movie

Image 06 - Make a loop
Image 07 - The yarn is twisted
Image 08 - Catch the yarn Image 09 - Draw through the loop Image 10 - Make another chain stitch Image 11 - Foundation row


3. Increases and decreases

Increase
It's very simple to make increases. Just work two stitches in the same stitch from the row below.

Decrease (in single crochet)
If your pattern says something like “ sc next 2 sts tog” or “sc2tog” (single crochet next two stitches together) or “dec over 2 sc” (decrease over next 2 stitches) that means that you need to do the following:

Step 1: Insert the hook in next stitch, yarn over and pull the loop through the stitch (2 loops on hook). (Image 12)

Step 2: Again, insert the hook in next stitch, yarn over and pull the loop through the stitch (3 loops on hook). (Image 13)

Step 3: Yarn over hook. Pull yarn through all 3 loops on the hook. (One decrease made) (Image 14)


4. Basic stitches

Chain stitch (ch)
As already described in the text above: Catch the yarn with the hook and draw it through the loop.

Slip stitch (sl st)
Insert your hook into next stitch (st), yarn over (yo), and draw through all loops (lps)

Single crochet (sc)
Insert hook in next stitch (st), yarn over (yo), pull the loop (lp) through the stitch (st) (2 loops on hook), yarn over (yo), pull the loop (lp) through both loops (lps) on the hook.


(Image 12)
(Image 13)
(Image 14)


5. How to end

Usually you will cut the yarn and pull it through last loop. Then weave in end to the back of work.

If you made a round object (like a ball) then do the following: slip stitch in next chain, then thread the tapestry needle with the tail and weave tail through the remaining stitches (sew up and down around each stitch) and pull tightly to close. (Image 15)


(Image 15)

Hide the tail inside the work by poking the needle to the other side. Tug on the yarn and cut the end close to the body; the end of the tail will get sucked inside.


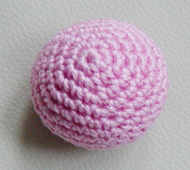
Let's practise what you've just learned by making this simple ball. The pattern uses the following techniques and stitches: Magic adjustable ring, Single crochet, Single crochet increases and decreases and Finishing the ball by weaving ends of yarn.

A Ball


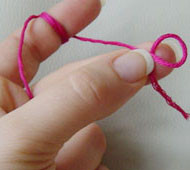
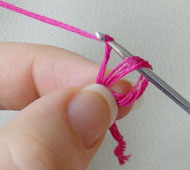
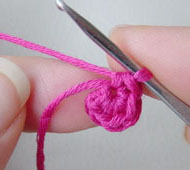
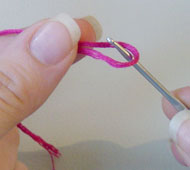
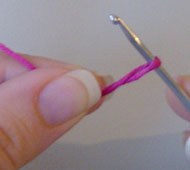
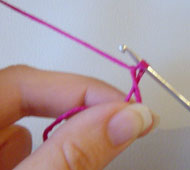
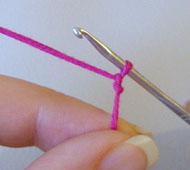
Start with Magic adjustable ring

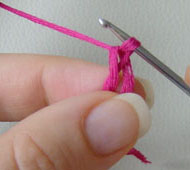
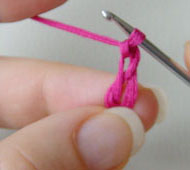
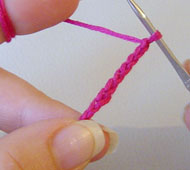
Rd 1: 5 sc into the center of ring (5)

Start increasing right from the beginning:

Rd 2: 2 sc in each st around (10)

Rd 3: * Sc in next st, work 2 sc in next st, repeat from * around (15)

Rd 4: * Sc in next 2 sts, work 2 sc in next st, repeat from * around (20)

Rd 5: * Sc in next 3 sts, work 2 sc in next st, repeat from * around (25)

Rd 6: * Sc in next 4 sts, work 2 sc in next st, repeat from * around (30)

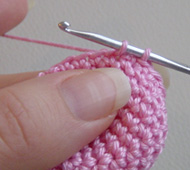
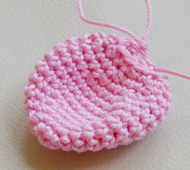
Work even for next 3 rounds (work in the same stitch without increasing or decreasing) :

Rd 7-9: Sc in each st around (30)
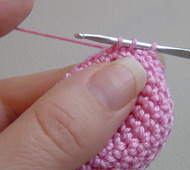
Start decreasing:

Rd 10: * Sc in next 4 sts, sc2tog over next 2 sts, repeat from * around (25)

Rd 11: * Sc in next 3 sts, sc2tog over next 2 sts, repeat from * around (20)

Rd 12: * Sc in next 2 sts, sc2tog over next 2 sts, repeat from * around (15)

Rd 13: * Sc in next st, sc2tog over next 2 sts, repeat from * around (10)

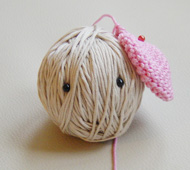
Your ball can serve multiple purposes. It could be used, for example, as a leaf or as an ear, even as a cap..... Just use your imagination and experiment.
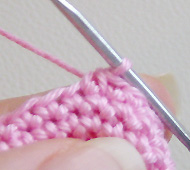
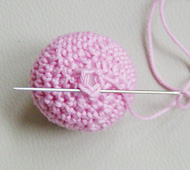
Stuf fthe ball!

Rd 14: *Sc2tog over next 2 sts, rep from * around. (5)

Cut yarn and pull it through last loop. Weave tail through remaining 5 stitches and pull tightly to close. Weave in ends to hide.


Copyright © 2007 Pepika.com